Ever looked at a bird photo—we don’t mean a rushed informal snapshot, but a photo with some soul—and wondered, “how was this avian magnificence captured?” Well, the criteria for taking such photos is easier than most people assume.
Don’t get us wrong, bird photography can be a particularly challenging project—especially due to the elusive nature of the animals. The trick to capturing timeless images lies in leveraging the best nature photography practices. Become a self-appointed bird photography ‘guru’ by following 3 simple guidelines.
- Invest in High-Quality Gadgets
Laying claim to enviable photography is not just about your equipment. Your camera is merely an enabling tool. You can own the best and most expensive lens or camera, but the quality of your shots is lackluster. A good photograph calls for passion, practice, patience, and perseverance. Without these, then the lens can be as well useless. However, this doesn’t mean that you shouldn’t invest in high-quality equipment.
“We become what we behold. We shape our tools, and thereafter our tools shape us.”
– Marshal McLuhan, Canadian philosopher,
Some bird photography projects demand certain gadgets—regardless of your skills. For example, capturing fast-moving birds like the Peregrine falcon—which is known to reach speeds of up to 320km/hour—can be quite the challenge without relevant lenses. In such a scenario, you have better odds with a professional camera and a good autofocus lens that is capable of capturing fast-moving objects.
The same applies to species of birds that spook easily (e.g., woodpeckers) or tend to nest in hard-to-reach places – you need a camera that can zoom from a distance. Long story short, the importance of investing in a good camera lens is hinged on the type of photography and kind of birds you intend to capture.
Tip: For woodpeckers and other ‘twitchy’ birds, ensure there are no lights behind you—and only move when the bird is distracted.
- Background! Background! Background!
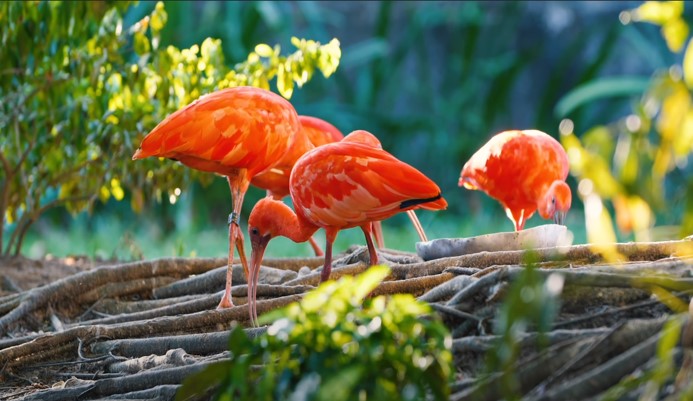
As a photographer, it’s your responsibility to attract the attention of viewers and keep them glued to your photo. For this, you need to pick your backgrounds wisely. Just take a quick look at some of the bird photos by award-winning professionals. Most—if not all—pay special attention to their backgrounds. Here are some of the tips and best practices for a background that complements the primary subject of your bird photos:
- If there are too many obstructions, find a new angle.
- Apply the patience required for the bird to change to a new position.
- If the background is plain and boring, reposition, and have another go.
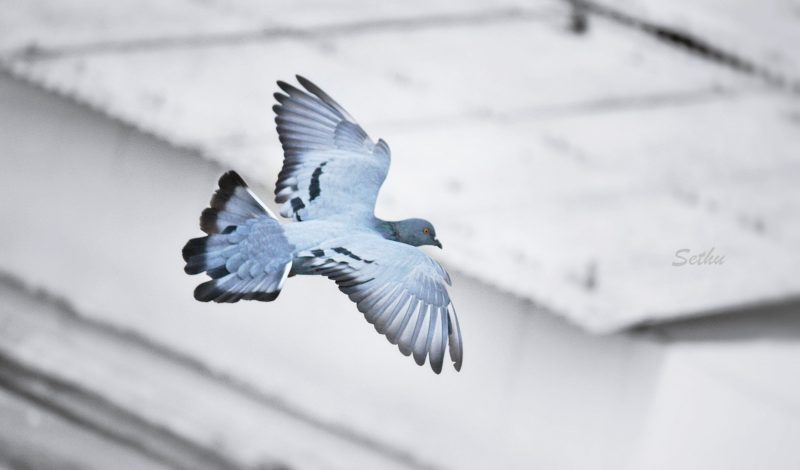
- A blurred background works perfectly.
- Get the Composition and Lighting Right
Who doesn’t love a clear and visible photo that accentuates all the unique features of a bird? Now add a sunrise or sunset blurred background? Sounds like perfection, right? Well, this typically comes down to the composition and lighting.
A good photograph—one that maintains the rules of color contrasting, bird off-center, frame-filling, and great light composition—goes all the way in expressing your emotions or intentions. A picture should speak the thoughts of the photographer. For example, the woodpecker’s color variance is well highlighted with maximum aperture value.
Talking of woodpeckers, did you know that they can hammer into solid wood up to 100 times in a minute—and come out unscathed? The little bird is well-adapted to withstand such punishment with little-to-no brain damage or injuries. But if you happen to come across a bird that is injured, here are some measures you should take:
What To Do if You Find an Injured Bird
As a bird lover, what is your first reaction when you come across an injured bird when you’re out in the field taking bird photographs? To help it, right? But as noble as your intentions are, lack of proper skills might end up causing more damage. Here are the procedures to follow about what to do if you find an injured bird:
- Handle with care: Wild birds are not accustomed to human touch. For this reason, they might try to run or hide. This is just a protective mechanism—and it should not dissuade you from lending a helping hand. Instead, pick it up with extreme care—depending on its size—and provide a comfortable environment for recovery.
- Find a safe place: In most cases, birds tend to get calm in dark places. Find a box and align it with some tissue or some pieces of cloth. Ensure you place the box near a good source of heat (taking note of the bird’s response). This helps reduce shock and prep the bird for flight.
- Find help: If the bird still looks pretty bad—even after it’s rested and off the shock—find the necessary help. PS: Do not offer any water or food to the bird without expert intervention.